| .. | ||
| gkos_bottom.stl | ||
| gkos_m1.stl | ||
| gkos_m3.stl | ||
| gkos_switch_plate_m1.stl | ||
| gkos_switch_plate_m3.stl | ||
| gkos_top.stl | ||
| README.md | ||
GKOS keyboard case
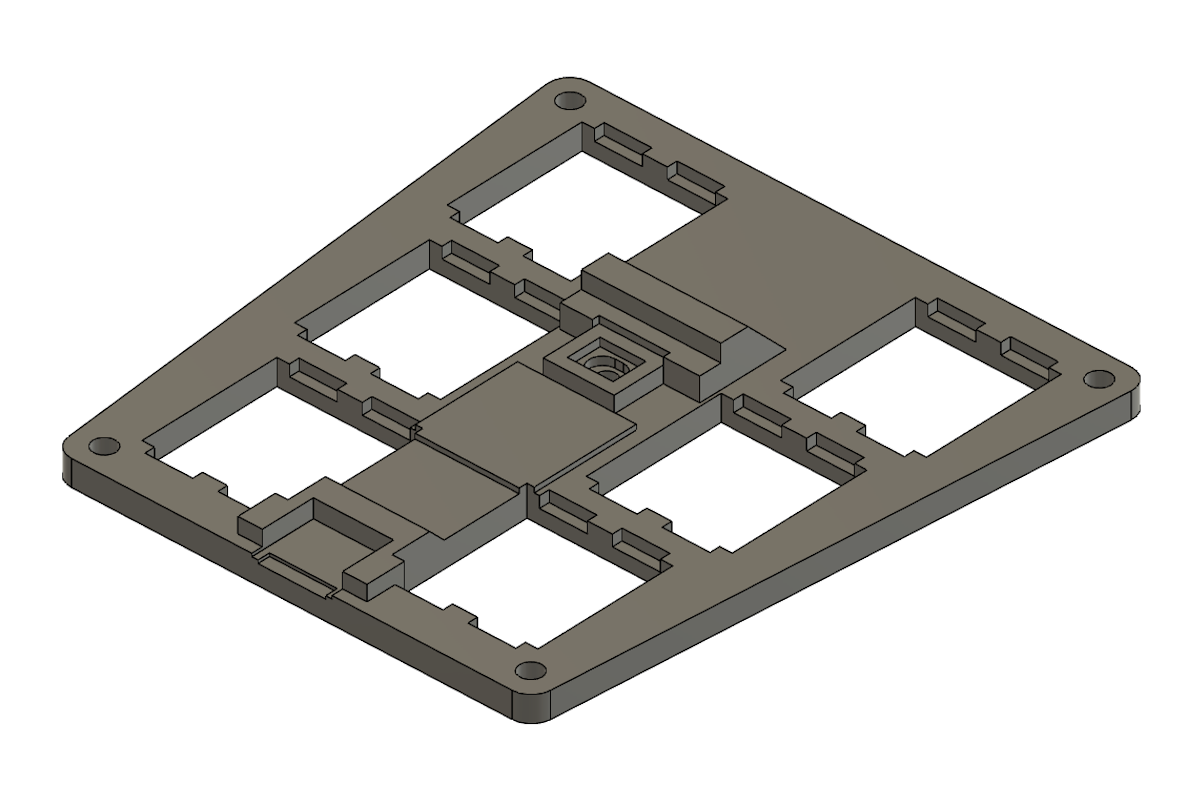
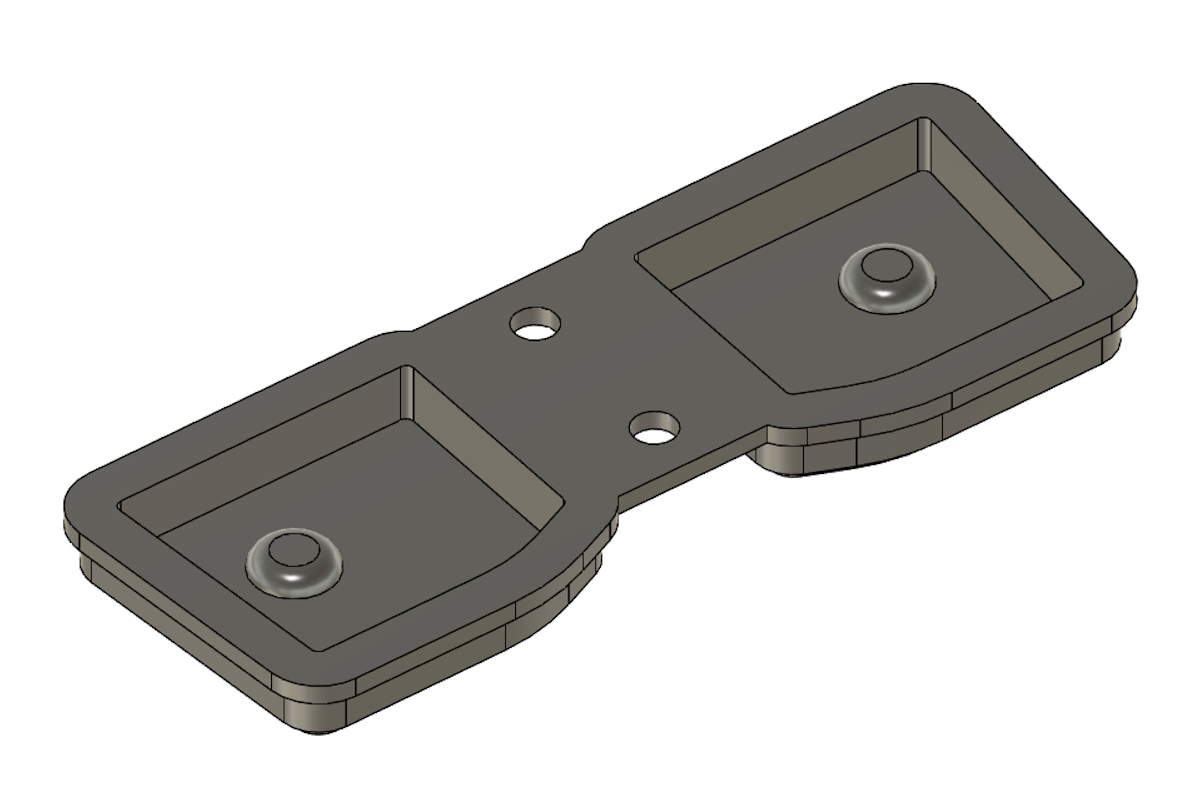
gkos_top.stl
The top part of the case houses the trackball, four mouse buttons, and three indicator LEDs.
There are holes in the corners for M2x3.5mm heat set inserts (I used 8mm height, 10mm would probably fit too) for the bottom plate to connect to.
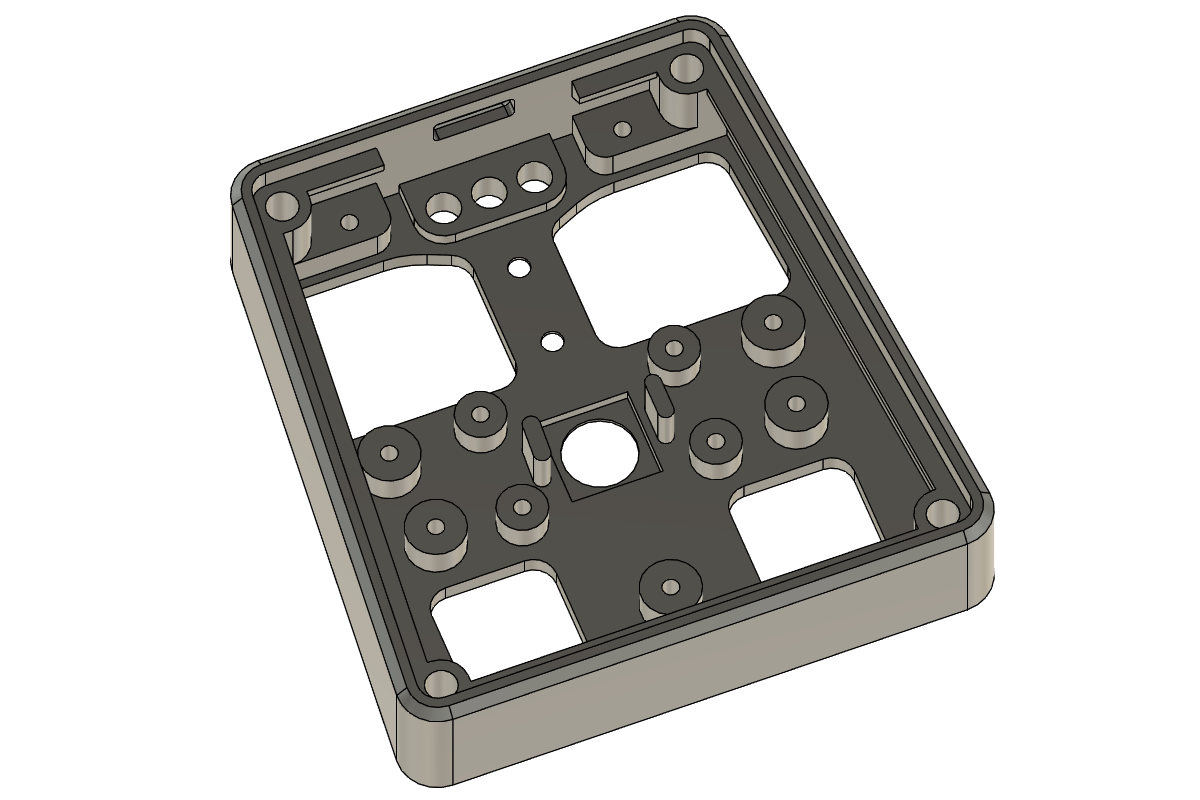 The button covers slot into the holes for them, with the top button assembly being attached with two countersunk M2 screws and nuts on the inside.
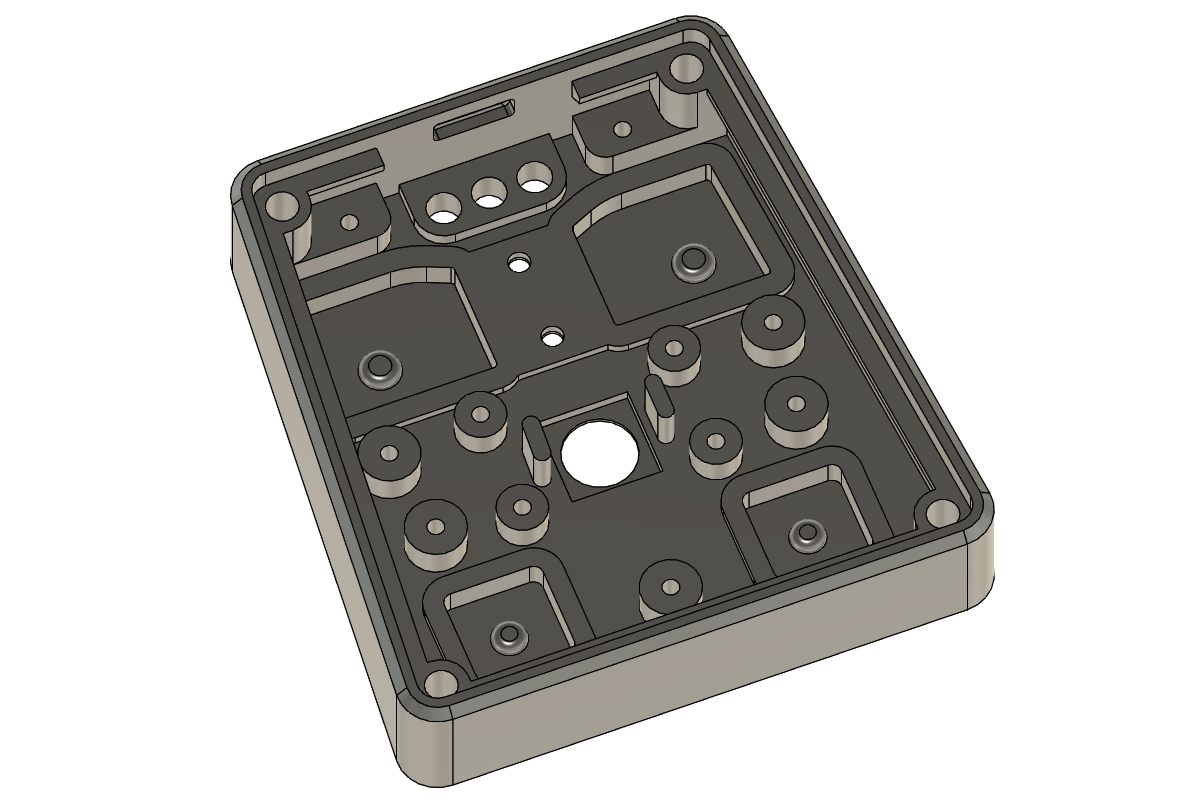 The switch plates (plate M1 on the top, M3 on the bottom) and the trackball attach with M2 screws which tap into the undersized holes. The indicator LEDs slot through the three holes at the top, and are glued into place with plastic adhesive (super glue would probably work as well).
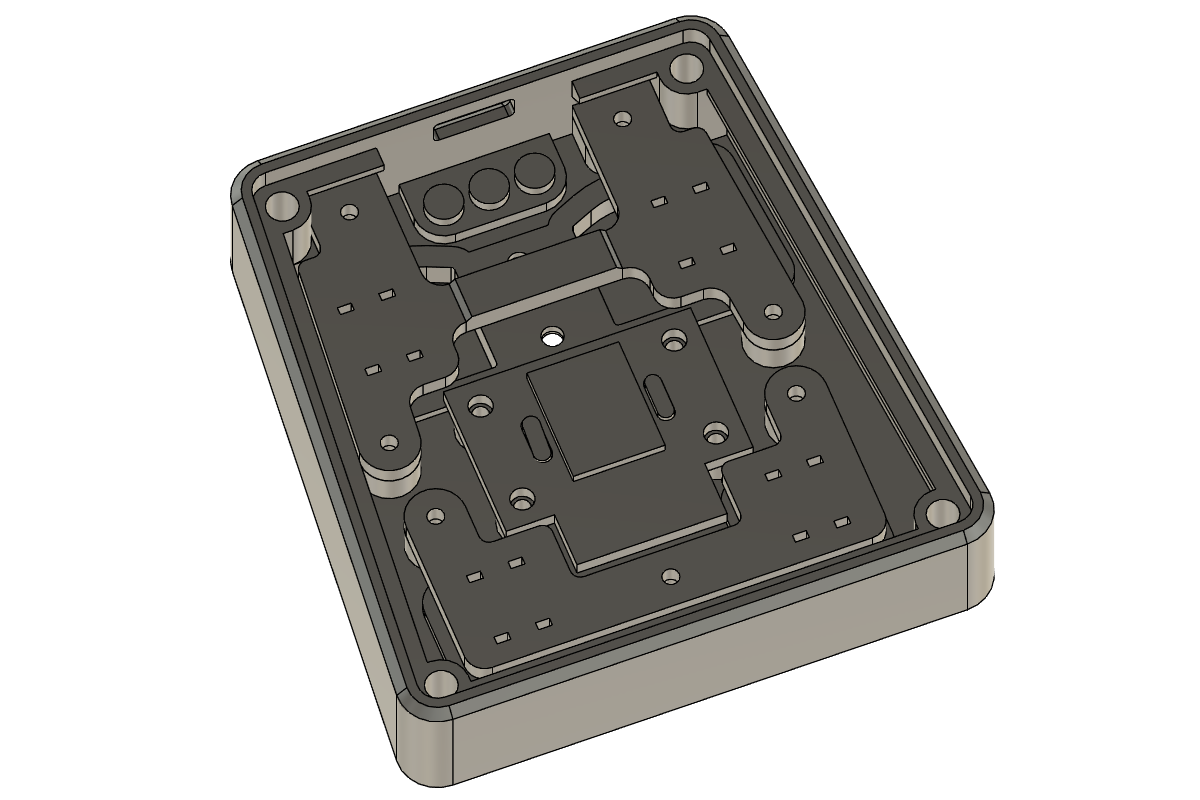
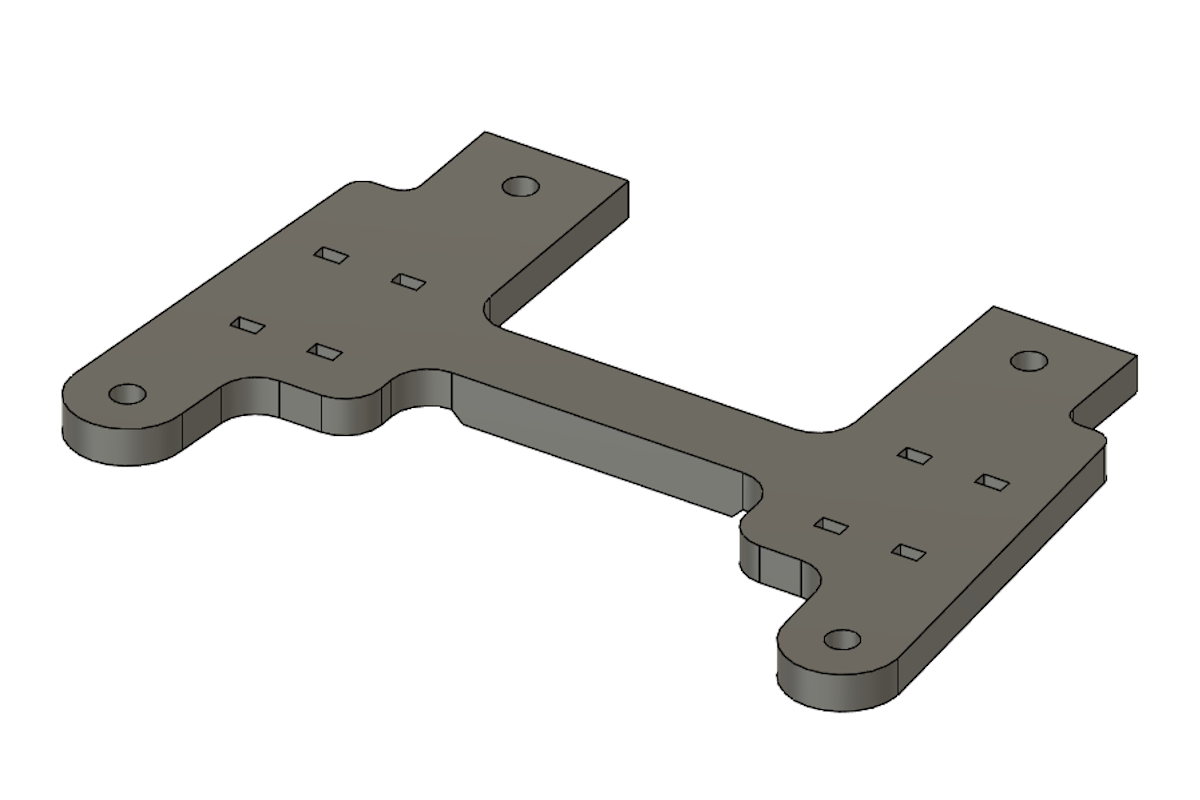
gkos_bottom.stl
The bottom part of the case houses the keyboard switches, and the Teensy microcontroller. The Teensy fits into the part with fairly snug support structures to hopefully keep it in place as the microUSB cable is inserted and removed. It's also taped into place with a piece of double sided foam tape on top of the main ARM chip. The reset button is accessible through a hole that fits a mechanical pencil tip, for example.
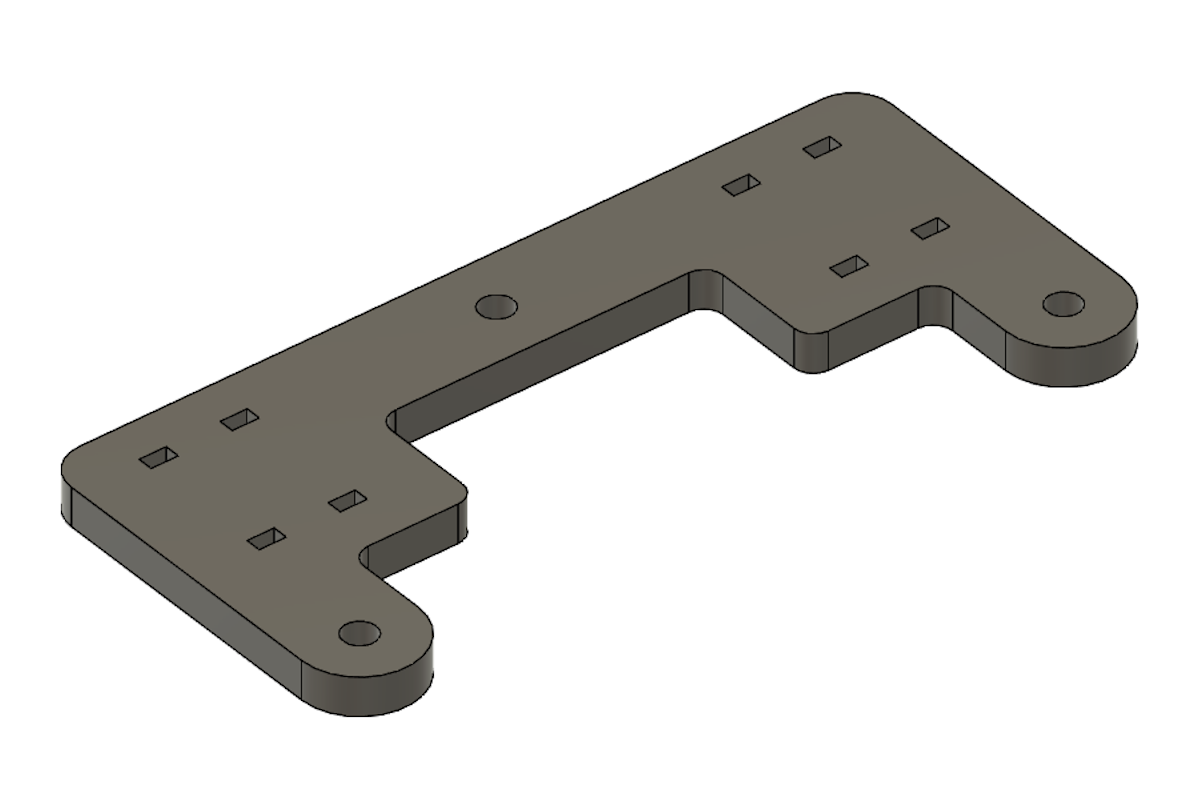
gkos_switch_plate_m1.stl
The switch plate for the top two buttons of the mouse (buttons 1 and 2). Two tactile switches fit on top with their leads slotting through holes, with plastic adhesive added in between to hold them in place. There's a bar connecting the two sides, with a thicker part that presses against the Teensy housed in the top half to keep it in place.
gkos_switch_plate_m3.stl
The switch plate for the bottom two buttons of the mouse also has two tactile switches on it, attached the same way as the top two.
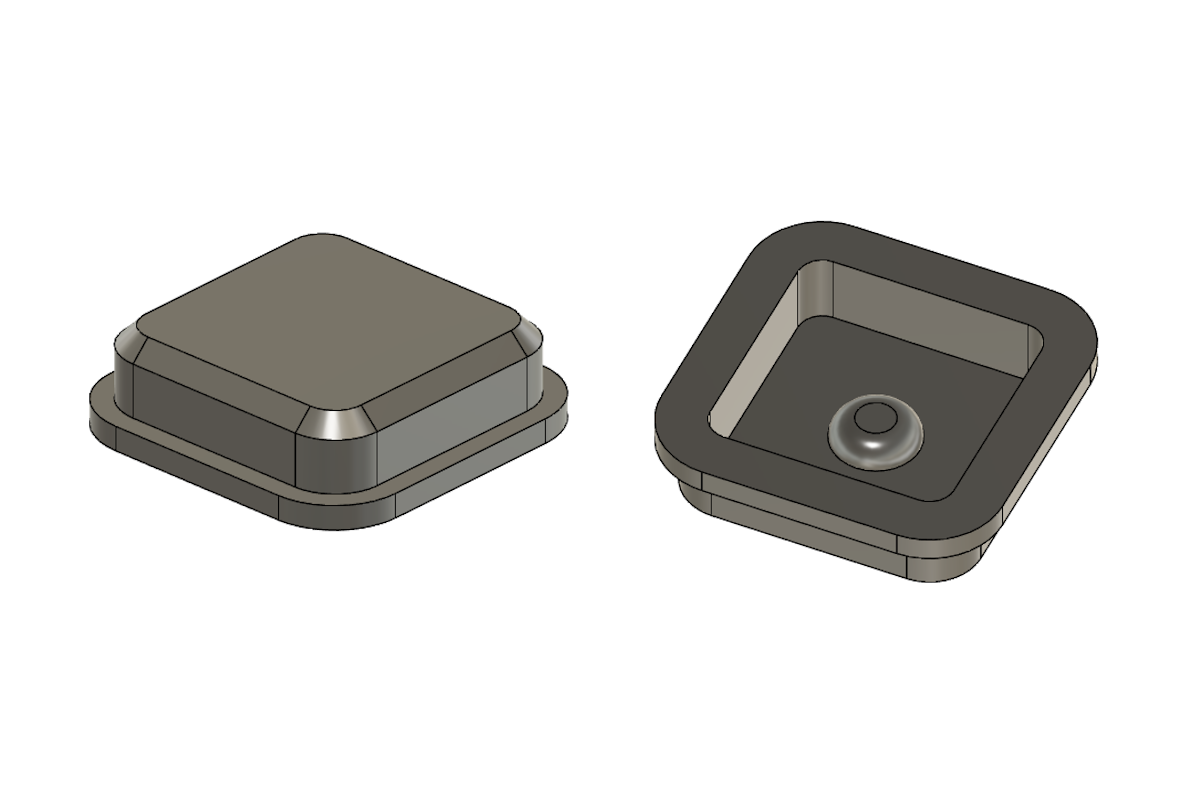
gkos_m1.stl
The top two button caps are a single piece that bends at the middle, similar to how mouse buttons usually work. This design allows for bigger button surfaces that actuate no matter which part they're pressed at (with a small difference in the force required to press them).
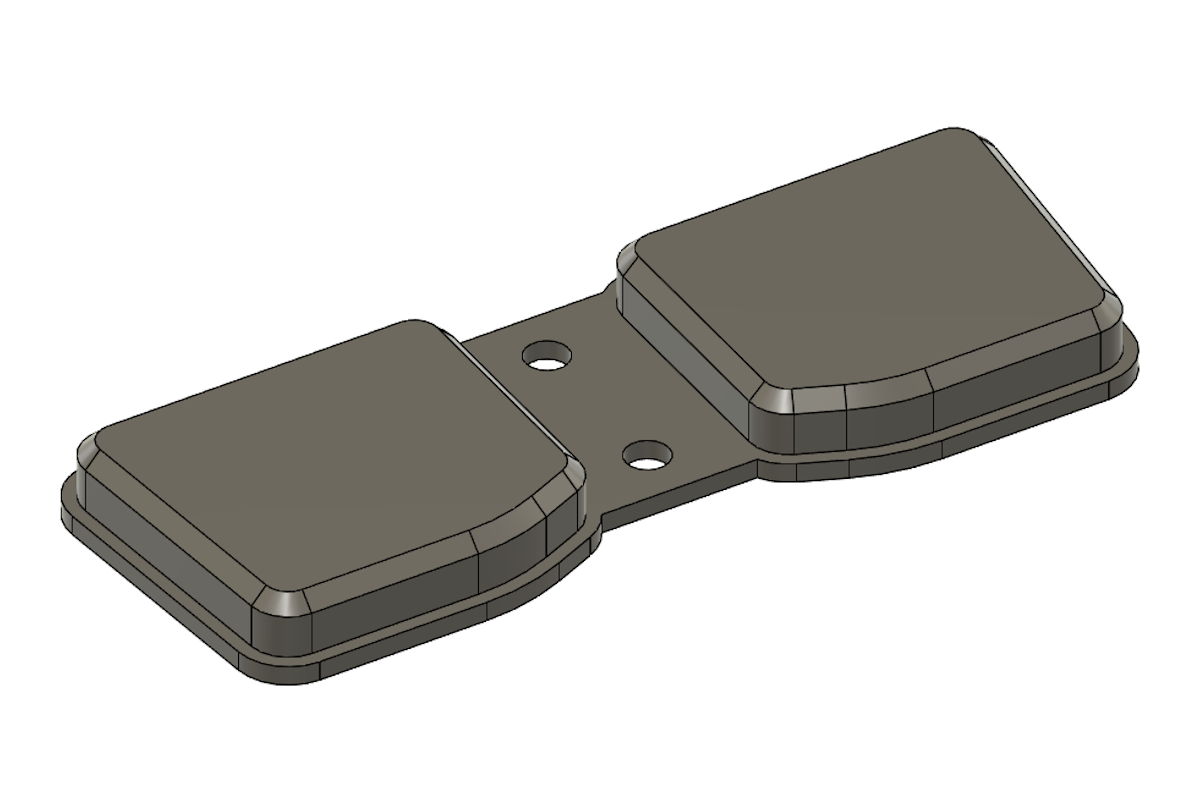 There are small rounded bumps on the bottom to interface with the plungers on the tactile switches.
gkos_m3.stl
The bottom two mouse button caps are symmetric, and fairly small in size to reduce wobbling.